BACK TO Element Cards
CCC Mathematics: Geometry
| CCSS: K.G.A.2 Correctly name shapes regardless of their orientations or overall size.
|
| CCC:
|
K.GM.1a1
|
Recognize two- dimensional shapes (e.g., circle, square, triangle, rectangle) regardless of orientation or size.
|
| Strand: Geometry
|
Family: Recognizing, Describing, Naming and Classifying
|
| Progress Indicator: E.GM.1a Recognizing, describing (using spatial language) and naming shapes regardless of orientation or size and locating shapes in the environment
|
| Essential Understandings
|
Concrete Understandings:
- Match shapes that are the same in shape and size.
- Identify shapes in their most common orientation (e.g., triangle, rectangle, square with horizontal bottom).
- Demonstrate the understanding of classes of shapes by matching or categorizing shapes that are the same shape but are different sizes (e.g., match circles even though they are different sizes).
|
Representation:
- Understand that shapes have names and can be labeled.
- Given a picture, name a 2-D shape.
|
Suggested Instructional Strategies:
- Teach using example, non-example varying the shape size and orientation (one shape at a time).
- Teach using time delay (multiple shapes).
- Teach rules for identifying shapes/properties of shapes (e.g., circles have no straight lines).
- Teach using sorting and classifying.
- Teach using kinesthetic strategies such as tracing the shapes or using yarn to create shapes.
- Teach using multisensory strategies (e.g., sandpaper, shaving cream and, rice).
- Have a classroom display of shapes that is positioned/stabilized so that all students can see, touch, and explore the items.
- Make shapes. Use sturdy Popsicle sticks, rulers, or other easy to manipulate items. Discuss the fact that to make a square you need 4 even sides, for a rectangle you need 2 short sides and 2 long sides and for a triangle you need 3 sides, with 2 being even. Mix up and rotate materials used to teach them that all shapes aren't the same size. If there is a danger of students hurting themselves or others with materials let them use play dough to create shapes. Use high contrast raised edges to aid students with vision problems.
- Using errorless teaching methods, give each student a piece of rope tied in a loop. Encourage them to see what shapes they can make. Work in groups and have students discover shapes in each other's work. If you have a student with limited mobility use a rope that stretches and make it big enough to easily manipulate.
- Using an iPad app, (Icky Shapes, Magic Sorter, etc.) allow students to practice their pointing skills while sorting and matching shapes.
|
Suggested Supports and Scaffolds:
- 2-D shapes with raised edges
- Interactive whiteboard
- 3-D shapes
- Environmental/real-world objects
- Interactive software (e.g., iPad games)
- Music, raps, or chants
- Shapes with various textures
- Magnetic shapes
- Include children's literature that talks about shapes.
- Use pool noodles on the edge of desks, wheelchair trays, or other surfaces to stabilize materials for students with limited mobility.
- Use high contrast backgrounds and neon colored materials for students with limited vision.
- Provide concrete objects, photo's, or voice activated devices for students who cannot see or verbally answer questions.
|
*Refer to Instructional Resource Guide for full descriptions and examples of systematic instructional strategies.
| CCSS: K.G.A.1 Describe objects in the environment using names of shapes, and describe the relative position of these objects using terms such as above, below, beside, in front of, behind, and next to.
|
| CCC:
|
K.GM.1a2
|
Recognize two-dimensional shapes in the environment regardless of orientation or size.
|
| Strand: Geometry
|
Family: Recognizing, Describing, Naming and Classifying
|
| Progress Indicator: E.GM.1a Recognizing, describing (using spatial language) and naming shapes regardless of orientation or size and locating shapes in the environment
|
| Essential Understandings
|
Concrete Understandings:
- Match shapes that are the same in shape and size
- Identify shapes in its most common orientation (e.g., Triangle, rectangle, square with horizontal bottom).
- Demonstrate the understanding of classes of shapes by matching or categorizing shapes that are the same shape but are different sizes (e.g., match circles even though they are different sizes)
|
Representation:
- Understand that shapes have names and can be labeled
- Given a picture, name a 2-d shape
|
Suggested Instructional Strategies:
- 2-DShape Walk: Students hunt for 2-dimensional shapes in the gym, library, or on a walk around the school, keeping a record of their discoveries as they go. Start with a discussion of the shapes you will be looking for. If students have a significant cognitive disability, focus on one shape and make it a week long adventure. Bring items back to the classroom if possible or take pictures of items the class has discovered. Create a display that can be positioned/stabilized where all students can see, touch, and explore the items. This should also be a tactile exploration activity for students with vision problems or limited mobility.
- Scavenger Hunt: Display shapes in various places and on various items in the school. Make sure the shapes are attached to an item that is an example of the shapes you are searching for. If students have a significant cognitive disability, focus on one shape and make it a week long adventure. Give adults working with the students or the students themselves a scavenger hunt list. The list could be a series of pictures of places in the school or riddles the students/adults have to solve to find the hidden shapes. After all shapes are gathered return to the room and match/sort shapes as a group. Discuss the shape of the item the shape was attached to.
- Create a "feely" box by cutting a hole in a heavy cardboard box and adding a sock cuff to the hole. Place differently shaped objects into the box. Children can draw a shape card and try to find an object in the "feely" box that matches that shape.
- Use multiple exemplar strategy (various sized/textured/colored shapes) while playing a shape scavenger hunt (teacher places various sized shapes around the classroom and students search for the shapes and identify them once found).
- Variations for added engagement: magnifying glasses (students become shape detectives), butterfly nets (students capture the shapes once they are found), flashlights (students shine light on the discovered shapes)
- Students label varying sized real-world objects around the classroom by shape (e.g., put a cutout of a rectangle on the white board).
- Teacher models and encourages students to use size and shape vocabulary during lessons (e.g., I see/feel a big rectangle).
- Use multiple exemplar strategy (various sized/textured/colored shapes) to have students search for and identify various shapes in a sensory table (sand, rice, water).
- Use multiple exemplar strategy (various sized/textured shapes) while having students find specific shapes by touch (students feel for shapes placed in a bag).
- Graphic Organizers can be used to sort varying sized shapes (4-column chart with shapes taped/glued on, labeled buckets with shapes placed inside).
|
Supports and Scaffolds:
- 2-D Shape Walk: Students hunt for 2-dimensional shapes in the gym, library, or on a walk around the school, keeping a record of their discoveries as they go. Start with a discussion of the shapes you will be looking for. If students have a significant cognitive disability, focus on one shape and make it a week long adventure. Bring items back to the classroom if possible or take pictures of items the class has discovered. Create a display that can be positioned/stabilized where all students can see, touch, and explore the items. This should also be a tactile exploration activity for students with vision problems or limited mobility.
- Scavenger Hunt: Display shapes in various places and on various items in the school. Make sure the shapes are attached to an item that is an example of the shapes you are searching for. If students have a significant cognitive disability, focus on one shape and make it a week long adventure. Give adults working with the students or the students themselves a scavenger hunt list. The list could be a series of pictures of places in the school or riddles the students/adults have to solve to find the hidden shapes. After all shapes are gathered return to the room and match/sort shapes as a group. Discuss the shape of the item the shape was attached to.
- Create a "feely" box by cutting a hole in a heavy cardboard box and adding a sock cuff to the hole. Place differently shaped objects into the box. Children can draw a shape card and try to find an object in the "feely" box that matches that shape.
- 2-D shapes with raised/textured edges (can be made with puffy paint for raised, hole punched/decorative scissors for textured)
- Poems, chants (e.g., a circle is a circle no matter how small/big)
- Textured shapes (can be made by gluing sand, beads, rice, yarn, etc. to cardboard shapes)
- Extra large shapes (can be made out of poster board)
- Assistive technology/voice output devices for identifying shapes and size
|
* Refer to Instructional Resource Guide for full descriptions and examples of systematic instructional strategies.
| CCSS: K.G.A.1 Describe objects in the environment using names of shapes, and describe the relative position of these objects using terms such as above, below, beside, in front of, behind, and next to.
|
| CCC:
|
K.GM.1a3
|
Use spatial language (e.g., above, below, etc.) to describe two-dimensional shapes.
|
| Strand: Geometry
|
Family: Recognizing, Describing, Naming and Classifying
|
| Progress Indicator: E.GM.1a Recognizing, describing (using spatial language), and naming shapes regardless of orientation or size and locating shapes in the environment
|
| Essential Understandings
|
Concrete Understandings:
- Demonstrate an understanding of the following terms: above, below, left, right, under, on top of.
|
Representation:
- Given a picture of 2 objects, use positional words to describe their orientation.
|
Suggested Instructional Strategies:
- Before students arrive, hide shapes in items that students will be using throughout the school day. Make a display that can be easily moved to students and that will be positioned/stabilized where all students can see, touch, and explore the shapes. The display should have a picture/cutout of a classroom item (desk, tray, chair, etc…) Explain at the beginning of the day that you have hidden the items, under, on top of, beside, etc… and this is an activity that will continue until all items are found. When students find the items they should raise their hand, tell the class what position it was in and place it in the same position on the display. At the end of the day discuss the positions and the number of items found.
- Shape movement games (e.g., The Shape Hokey Pokey, put the circle in, put the circle out, put the circle above (above your head), and shake it all about...)
- Teacher models the use of positional and shape vocabulary during lessons (e.g., I see/feel a triangle under the table.)
- Model-Lead-Test (teacher models a math problem: the square is above my head, leads students in positioning shapes correctly, and then tests students' ability to position shapes with minimal needed supports)
- Students explore and manipulate shape blocks and are encouraged to identify the position of the shapes
- Give each child a shape (can make shape hats, put shapes on Popsicle sticks, make a shape necklace, etc.) and instruct shapes (circles stand up, squares crawl under the table, triangles put your hands above your head, etc.)
|
Suggested Supports and Scaffolds:
- If students have limited mobility put in relation to an item they use every day, their feeding equipment/plate/tray/voice device.
- Provide items with high contrast, neon colors in familiar places for students with visual impairments.
- Students who are unable to recognize multiple shapes may need concrete items with Velcro attached to place on the display.
- Use errorless choices when working with a student who requires assistance instead of doing the task for them or correcting their choices.
- 2-D shapes with raised/textured edges (can be made with puffy paint for raised, hole punched/decorative scissors for textured)
- Poems, chants (e.g., a square is a square no matter where)
- Textured shapes (can be made by gluing sand, beads, rice, yarn, etc. to hard cardboard shapes)
- Assistive technology/voice output devices for identifying shapes and position
|
* Refer to Instructional Resource Guide for full descriptions and examples of systematic instructional strategies.
Additional Resources
http://www.kidzone.ws/prek_wrksht/shapes.htm
http://www.storyplace.org/
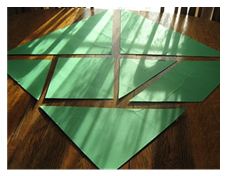
| CCSS: K.G.B.6 Compose simple shapes to form larger shapes. For example, "Can you join these two triangles with full sides touching to make a rectangle?"
|
| CCC:
|
K.GM.1c1
|
Compose a larger shape from smaller shapes
|
| Strand: Geometry
|
Family: Constructing/Building
|
| Progress Indicator: E.GM.1c Composing two-dimensional shapes (rectangles, squares, triangles, half-circles, and quarter circles)
|
| Essential Understandings
|
Concrete Understandings:
- Identify 2-D shapes.
- Given two 2-D concrete shapes, put them together to form a larger shape.
|
Representation:
- Given a picture identify a 2-D shape.
|
Suggested Instructional Strategies:
- Use pre-cut shapes and allow students to create 'creatures' from them. Allow each student to describe or provide a buddy or voice activated device to describe their creation.
- Make shape collage pictures to represent different seasons and activities throughout the school year. As students are able, give them paper and let them cut out and create their own collages from the identified shapes. Begin the school year using 1 or 2 shapes and add others as year progresses and students recognize the different shapes and their sizes.
- Use edibles, gummy worms, Cheetos, etc., to create shapes during snack time
Task Analysis
- Present a square (this is a square)
- Present another square (this is another square)
- I can put two shapes together to make a bigger shape
- Put shapes together
- I made a rectangle with two squares
- It is bigger
- Model creating a larger shape from small shapes, lead (help students create a larger shape from small shapes), and test student's ability to create and identify a larger shape from small shapes with minimal needed supports.
- Have students create their own shape (cut, decorate, mold, etc.) and then have the class join their shapes together to make a larger shape.
|
Suggested Supports and Scaffolds:
- Pattern blocks
- Tangram
- Geoblocks (3-D)
- Use high contrast, raised, neon colors for students with visual impairments.
- Provide a buddy for students with limited mobility when cutting. Encourage buddy to place items exactly as student requests.
- Use pool noodles to stabilize materials on trays or tables.
- Use errorless choices when working with a student who requires assistance instead of doing the task for them or correcting their choices.
- Magnetic shapes and a magnet board for easy movement and control of shapes
- Extra-large tangrams (can be made out of poster board)
- 2-D shapes with raised/textured edges (can be made with puffy paint for raised, hole punched/decorative scissors for textured)
- Textured shapes (can be made by gluing sand, beads, rice, yarn, etc. to hard cardboard shapes)
- Assistive technology/voice output devices for identifying shapes
- Interactive software
- iPad games
- Water drawing mat with shape stencils or shape sponges
- Magnetic coloring board with shape stencils or shape magnets
- Play dough with shape cookie cutters
- Flannel board and flannel shapes
|
| CCSS: K.G.B.6 Compose simple shapes to form larger shapes. For example, "Can you join these two triangles with full sides touching to make a rectangle?"
|
| CCC:
|
1.GM.1b1
|
Identify shapes as two-dimensional (lying flat) or three-dimensional (solid).
|
| Strand: Geometry
|
Family: Recognizing, Describing, Naming and Classifying
|
| Progress Indicator: E.GM.1b Analyzing and comparing two- (and later) three-dimensional shapes using informal language (e.g., flat, solid, corners) to describe their differences and similarities, as well as their component parts (number of sides, vertices) and other attributes (e.g., sides of equal length)
|
| Essential Understandings
|
Concrete Understandings:
- Match shapes that are the same dimension.
- Sort shapes that are the same dimension.
|
Representation:
- Demonstrate the understanding of classes of shapes by categorizing shapes that are the same dimensions (e.g., classify balls as being 3-D even though they are different sizes)
- Vocabulary: 2-dimensional, 3- dimensional
|
Suggested Instructional Strategies:
- Teach explicit rules for discriminating 2-D from 3-D shapes (e.g., 2-D is flat).
- Teach using example, non-example.
- Sort and classify 2-D and 3-D shapes.
- Have students create their own shape (cut, decorate, mold, etc.) and then have the class join their shapes together to make a larger shapes.
|
Suggested Supports and Scaffolds:
- Interactive whiteboard
- Labeled 2-D and 3-D shape as a model
- Assistive technology/voice output devices for identifying shapes
- Shapes (both 2-D and 3-D) with raised/textured edges (can be made with puffy paint for raised, hole punched/decorative scissors for textured)
- Magnetic shapes and a magnet board for easy movement and control of shapes
- Use errorless choices when working with a student who requires assistance instead of doing the task for them or correcting their choices.
- Use pool noodles to stabilize materials on trays or tables.
- Use high contrast, raised, neon colors for students with visual impairments.
|
* Refer to Instructional Resource Guide for full descriptions and examples of systematic instructional strategies.
| CCSS: 2.G.A.1 Recognize and draw shapes having specified attributes, such as a given number of angles or a given number of equal faces. Identify triangles, quadrilaterals, pentagons, hexagons, and cubes.
|
| CCC:
|
2.GM.1a4
|
Identify two- dimensional shapes such as rhombus, pentagons, hexagons, octagon, ovals, equilateral, isosceles, and scalene triangles.
|
| Strand: Geometry
|
Family: Recognizing, Describing, Naming and Classifying
|
| Progress Indicator: E.GM.1a Recognizing, describing (using spatial language) and naming shapes regardless of orientation or size and locating shapes in the environment
|
| Essential Understandings
|
Concrete Understandings:
- Identify the side of a 2-D shape.
- Identify the corner/vertices of a 2-D shape.
- Identify the number of sides or corners/vertices of 2-D shapes.
- Count up to 8.
|
Representation:
- Given pictures of 2-D shapes, count the number of sides and name the shapes.
|
Suggested Instructional Strategies:
- Model naming shapes in the environment then ask students to identify or locate shapes within their own learning environment.
- Model naming shapes shown in pictures of the environment then ask students to identify shapes found in pictures of their environment. Generalize to novel pictures such as illustrations in books.
- Time delay to teach shapes.
- Teach using example, non-example.
|
Suggested Supports and Scaffolds:
- Pattern blocks
- Shape cards
- iPad applications that show student pictures of these shapes in their real life settings.
- Assisting technology
- Use high contrast, raised, neon colors for students with visual impairments.
- Labeled shapes as a model
- 2-D shapes with raised/textured edges (can be made with puffy paint for raised, hole punched/decorative scissors for textured)
|
* Refer to Instructional Resource Guide for full descriptions and examples of systematic instructional strategies.
| CCSS: 2.G.A.1 Recognize and draw shapes having specified attributes, such as a given number of angles or a given number of equal faces. Identify triangles, quadrilaterals, pentagons, hexagons, and cubes.
|
| CCC:
|
2.GM.1b3
|
Distinguish two- or three- dimensional shapes based upon their attributes (i.e., #of sides, equal or different lengths of sides, # of faces, # of corners).
|
| Strand: Geometry
|
Family: Recognizing, Describing, Naming and Classifying
|
| Progress Indicator: E.GM.1b Analyzing and comparing two- (and later) three-dimensional shapes using informal language (e.g., flat, solid, corners) to describe their differences and similarities, as well as their component parts (number of sides, vertices) and other attributes (e.g., sides of equal length)
|
| Essential Understandings
|
Concrete Understandings:
- Recognize flat objects as 2-D and objects with length, height, and width as 3-D objects.
|
Representation:
- Identify the number of sides, corners/vertices, and faces on 2-D and 3-D shapes
|
Suggested Instructional Strategies:
- Give each student shape blocks, and allow them to hold, feel, and see the different characteristics of each. Students can then fill in a chart that describes the different attributes. (Is the shape round or straight? Are the edges smooth or pointed?)
- Teach explicit rules for discriminating 2-D from 3-D shapes (e.g., 2-D is flat).
- Teach using example, non-example.
- Sort and classify 2-D and 3-D shapes.
- Have students create their own shape (cut, decorate, mold, etc.) and then have the class join their shapes together to make larger shapes.
|
Suggested Supports and Scaffolds:
- Interactive whiteboard
- Labeled 2-D and 3-D shape as a model
- Assistive technology/voice output devices for identifying shapes
- Shapes (both 2-D and 3-D) with raised/textured edges (can be made with puffy paint for raised, hole punched/decorative scissors for textured)
- Magnetic shapes (both 2-D and 3-D) and a magnet board for easy movement and control of shapes
- Use errorless choices when working with a student who requires assistance instead of doing the task for them or correcting their choices.
- Use pool noodles to stabilize materials on trays or tables.
- Use high contrast, raised, neon colors for students with visual impairments.
|
| CCSS: 2.G.A.1 Recognize and draw shapes having specified attributes, such as a given number of angles or a given number of equal faces. Identify triangles, quadrilaterals, pentagons, hexagons, and cubes.
|
| CCC:
|
2.GM.1e1
|
Draw two-dimensional shapes with specific attributes.
|
| Strand: Geometry
|
Family: Constructing/Building
|
| Progress Indicator: E.GM.1e Drawing and identifying shapes with specific attributes (e.g., number of sides or equal angles) not determined by direct measuring)
|
| Essential Understandings
|
Concrete Understandings:
- Recognize a 2-D shape (know that this:
 is not a shape). is not a shape).
|
Representation:
- Identify the attributes of basic shapes (e.g., a straight line, a corner, a curved line).
- Identify basic shapes and their attributes.
|
Suggested Instructional Strategies:
- Task analysis for drawing shapes with straight lines: Teacher places prepared (i.e., labeled with progressive numbers) paper or other item to be drawn on in appropriate location for student (e.g., placed on a slant board and taped down). For some students this skill may be more efficiently taught using most-to-least prompts.
- Hold writing utensil.
- Put point of utensil on point 1.
- Draw a line from point 1 to point 2.
- Stop, adjust utensil as needed.
- Draw a line from point 2 to point 3.
- Continue with 4th point for quadrilaterals.
- End back at 1st point to complete the shape.
- Model drawing shapes; provide a visual model for student to follow.
|
Suggested Supports and Scaffolds:
- Interactive whiteboard
- Assistive technology
- Tracing templates (e.g., dotted lines, faded lines, wiki sticks, shape cutouts, stencils); allow partial participation where student may complete the quadrilateral
- Computer software
- Cheat sheet with examples of shapes
- Objects for creating shapes (e.g., popsicle sticks, pipe cleaners)
|
| CCSS: 2.G.A.3 Partition circles and rectangles into two, three, or four equal shares, describe the shares using the words halves, thirds, half of, a third of, etc., and describe the whole as two halves, three thirds, four fourths. Recognize that equal shares of identical wholes need not have the same shape.
|
| CCC:
|
2.GM.1f2
|
Partition circles and rectangles into 2 and 4 equal parts.
|
| Strand: Geometry
|
Family: Geometric Problems
|
| Progress Indicator: E.GM.1f Partitioning shapes into 2, 3, or 4 equal parts and describing the parts (halves, quarters, fourths, thirds)
|
| Essential Understandings
|
Concrete Understandings:
- Identify that when a shape is folded and its sides match up it has been partitioned into 2 or 4 equal parts
|
Representation:
- Select pictures that have been partitioned into 2 or 4 equal parts
|
Suggested Instructional Strategies:
- Model-Lead-Test: Partition objects that have a real-world application (e.g., graham crackers, fruit, paper for art projects).
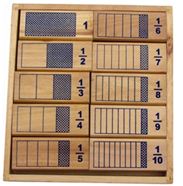
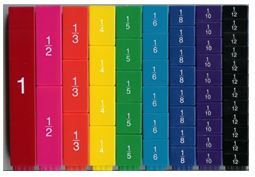
- Demonstrate for students, using fraction bars, interactive whiteboard manipulatives, or iPad manipulates as they are available.
- Use a System of Least prompt.
|
Suggested Supports and Scaffolds:
- Interactive whiteboard
- Assistive technology
- Tracing templates (e.g., dotted lines, faded lines, wiki sticks, shape cutouts, stencils); allow partial participation where student may complete the quadrilateral
- Ruler
- Models of partitioned shapes
- Use real materials (food, candy, wood, tangrams, stamps, pictures of real objects) to support students in making real-world connections.
|
* Refer to Instructional Resource Guide for full descriptions and examples of systematic instructional strategies.
| CCSS: 2.G.A.3 Partition circles and rectangles into two, three, or four equal shares, describe the shares using the words halves, thirds, half of, a third of, etc., and describe the whole as two halves, three thirds, four fourths. Recognize that equal shares of identical wholes need not have the same shape.
|
| CCC:
|
2.GM.1f3
|
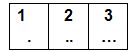
Label a partitioned shape (e.g., one whole rectangle was separated into 2 halves; one whole circle was separated into three thirds).
|
| Strand: Geometry
|
Family: Geometric Problems
|
| Progress Indicator: E.GM.1f Partitioning shapes into 2, 3, or 4 equal parts and describing the parts (halves, quarters, fourths, thirds)
|
| Essential Understandings
|
Concrete Understandings:
- Understand the concept that a portion is a part of the whole.
- Fold a rectangular piece of paper into 2 or 4 equal parts.
|
Representation:
- Identify and use vocabulary for whole, part, partition.
|
Suggested Instructional Strategies:
- Task analysis
- Count the total number of pieces (2, 3, or 4).
- Write or place the total number of pieces in the lower portion of a fraction template (i.e., for a rectangle separated into 2 halves: /2).
- Count the number of pieces to be labeled.
- Write or place the number of pieces to be labeled in the upper portion of the fraction template (i.e., for a rectangle separated into 2 halves: 1/2).
- Model labeling partitioned shapes.
|
Suggested Supports and Scaffolds:
- Fractional representations without numbers but with raised dots (e.g., Dominos)
- 3-D shapes that can be partitioned
- Shapes with portions labeled with numbers and raised dots
- Response cards with fractions
- Food that can be divided (e.g., graham crackers)
- Fraction stamp
|
| CCSS: 3.G.A.1 Understand that shapes in different categories (e.g., rhombuses, rectangles, and others) may share attributes (e.g., having 4 sides) and that the shared attributes can define a larger category (e.g., quadrilaterals). Recognize rhombuses, rectangles, and squares as examples of quadrilaterals that do not belong to any of these subcategories.
|
| CCC:
|
3.GM.1h1
|
Identify shared attributes of shapes.
|
| Strand: Geometry
|
Family: Recognizing, Describing, Naming and Classifying
|
| Progress Indicator: E.GM.1h Describing, analyzing, comparing, and classifying two-dimensional figures (triangles, quadrilaterals) using shared attributes
|
| Essential Understandings
|
Concrete Understandings:
- Understand same and different.
- Match same.
- Sort by same and different.
|
Representation:
- Count the number of sides a shape has.
|
Suggested Instructional Strategies:
- Sorting shapes using wooden blocks
- Sorting game with shape game cards (teacher created)
- Use the saying: "A man who wears many hats" to describe the square (who can be called many things: polygon, quadrilateral, parallelogram, rectangle, etc.). Have the students draw a person with a square head wearing a hat to illustrate the concept. At the top of the paper have the students write the following saying: "A shape who wears many hats." At the bottom of the picture, have students explain the saying.
- Take a walking tour around the school environment and find all of the "real world" objects that are a designated shape – identify shared attributes.
- Play "I Spy" in areas such as the cafeteria or playground to identify shapes "I spy a rectangle," "Who spies a rectangle?", "Who can give me another name for this shape?"
|
Suggested Supports and Scaffolds:
- Tangram Sets
- Shape Blocks
- Assistive Technology
- Interactive whiteboard
- Real-world application
- Objects for creating shapes (e.g., popsicle sticks, pipe cleaners)
- Computer software
|
| CCSS: 3.G.A.2 Partition shapes into parts with equal areas. Express the area of each part as a unit fraction of the whole. For example, partition a shape into 4 parts with equal area, and describe the area of each part as ¼ of the area of the shape.
|
| CCC:
|
3.GM.1i1
|
Partition rectangles into equal parts with equal area.
|
| Strand: Geometry
|
Family: Geometric Problems
|
| Progress Indicator: E.GM.1i Partitioning shapes into equal parts with equal areas and recognizing that each part is a unit fraction of the whole
|
| Essential Understandings
|
Concrete Understandings:
- Understand the concept of equal parts (e.g., fold rectangular pieces of paper into 2 or 4 equal pieces).
- Partition with concrete objects.
- Find the rectangle that is the same or match two congruent rectangles.
|
Representation:
- Partition rectangles into two, three, or four equal shares.
- Understand the following concepts and vocabulary: equal, partition, area, rectangle, halves, thirds, half of, a third of
|
Suggested Instructional Strategies:
- Match to same
- Tiling
- Task analysis (measure length, divide by number of parts, mark each equal part)
- Multiple exemplars for equal and not equal
- Model-Lead-Test
- Use physical models and a trial and error approach (e.g., give student the "whole" rectangle, then give student various fractional pieces; students use trial and error with fractional pieces to determine the equal pieces that fit on the "whole").
|
Suggested Supports and Scaffolds:
- Computer software
- Ruler
- Calculator
- Paper with pre-determined lines (e.g., black lines, perforated lines)
- Real-world objects (graham crackers, 2 square-game that can be drawn with chalk on the hard top
- Fraction bars
- Geo Boards

|
* Refer to Instructional Resource Guide for full descriptions and examples of systematic instructional strategies.
| CCSS: 4.G.A.2 Classify two dimensional figures based on the presence or absence of parallel or perpendicular lines, or the presence or absence of angles of a specified size. Recognize right angles as a category, and identify right angles.
|
| CCC:
|
4GM.1h2
|
Classify two-dimensional shapes based on attributes (# of angles).
|
| Strand: Geometry
|
Family: Recognizing, Describing and Naming and Classifying
|
| Progress Indicator: E.GM.1h Describing, analyzing, comparing, and classifying two-dimensional figures (triangles, quadrilaterals) using shared attributes
|
| Essential Understandings
|
Concrete Understandings:
- Identify attributes within a 2-D figure (e.g., rectangles have sides, student identifies sides of rectangle and angles, student identifies angles in rectangle).
|
Representation:
- Identify parallel and perpendicular lines within 2-D shapes Recognize and identify right angles.
- Understand the following concepts and vocabulary: face, edge, corner, side, angle.
|
Suggested Instructional Strategies:
- Explicit instruction on attributes
- Model at least one example of thinking through the attributes.
- Multiple exemplar (e.g., shapes, angles, polygons)
- Think, pair, share
- Match the same to classify shape
- Using criteria for classifying each shape as a self check
- Match tangram pieces to same to classify shape—have students match the pieces based on the number of angles, not the same size.
- Have students use a graphic organizer (T-chart, paper with picture of shape you want them to find, etc.) to sort the shapes by classification.
- Use a Geoboard to make a 2-dimensional shape (rectangle, square, triangle, rhombus, diamond, etc.). Have students count the number of angles (points where the sides meet) and decide what shape it could be.
- Use objects to construct 2-dimensional shapes (toothpicks, paper, wiki-sticks). Have students count the number of angles in each.
- Have students complete an interactive whiteboard activity on 2-dimensional shapes that includes coloring or marking the angles of each shape. They could also place a "highlighter" mark over each angle in a shape and then count the angles.
- Have students find examples of angles throughout the classroom (paper corners, doors, file cabinets, tables, etc.). Have them take pictures of these real object angles and create a PowerPoint or a book (with iPad you can use "Little Storymaker") about the angles and shapes.
|
Suggested Supports and Scaffolds:
- Manipulatives
- Objects to construct quadrilaterals (toothpicks, paper, wiki-sticks)
- Geoboard
- Graphic organizer for classification
- Real-world examples (e.g., from classroom)
- Assistive Technology or voice output devices
- Computer software (e.g., sorting or matching games)
- Interactive whiteboard
- Tangram
- 2-D shapes, laminated
|
* Refer to Instructional Resource Guide for full descriptions and examples of systematic instructional strategies
Additional Resource
http://www.pdesas.org/module/content/resources/13281/view.ashx
| CCSS: 4.G.A.1 Draw points, lines, line segments, rays, angels, perpendicular, and parallel lines. Identify these in two-dimensional figures.
|
| CCC:
|
4GM.1j1
|
Recognize a point, line and line segment, and rays in two-dimensional figures.
|
| Strand: Geometry
|
Family: Recognizing, Describing and Naming and Classifying
|
| Progress Indicator: E.GM.1j Recognizing and drawing points, lines, line segments, rays, angles, and perpendicular and parallel lines and identifying these in plane figures
|
| Essential Understandings
|
Concrete Understandings:
- Recognize a 2-D shape from other shapes or non-shapes.
- Know characteristics of 2-D shapes.
|
Representation:
- Given a picture of a point, line or line segment not in a shape, correctly name the object.
- Accurately draw pictures of points, lines and line segments (not in shapes).
|
Suggested Instructional Strategies:
- Use pieces of string with knots at the end as "line segments" to form a shape. These start and stop in a "point." Where the "points" meet is the angle.
- Use pieces of string with no knots as rays. Form an angle with 2 of these. Explain that rays do not have an ending, or a stop, so they do not have a knot.
- Have students classify shapes as "having a stop" or "not having a stop". The ones with a stop have line segments and points. They should be able to lie the string along the lines of the shapes of those shapes "having a stop," with the knot ending on the points. The shapes without a stop are angles.
- Perpendicular: have students make the letter L with their left arm. Explain that this is perpendicular. Have them make a T with one hand straight up and one hand crossing the top of it. Explain that this is also perpendicular. Have them make the letter L with their thumb and forefinger. Explain that this is perpendicular. Have students notice that in perpendicular lines, they are touching at the corner, or the point. Then have students try to find perpendicular lines in the classroom.
- Parallel: Have students hold their arms out directly in front of them, palms facing up. Explain that this is parallel. Have them partner up, facing each other. Each partner places one arm out in front of them, side by side. Their arms should be parallel to each other. Explain that this is also parallel. Have students notice that in parallel lines, they are NOT touching at all. Then have students try to find parallel lines in the classroom.
- After students find parallel and perpendicular lines in the classroom, have them identify perpendicular and then parallel lines in shapes. Remind them that parallel lines do NOT touch.
- Have students draw a line on graph paper. The line must go straight up, at least 5 blocks. Then have students draw another line, 1 block over, the same length as the first. This is parallel. Have students choose a color (crayon or marker) and draw another set of parallel lines on the graph paper.
- Have students draw a line on graph paper. The line must go straight across, at least 5 blocks. Then have students draw another line, but this time, they must start on the third block of the first line, and go straight up, at least 5 blocks. This pair of lines is perpendicular. Have students choose a color and draw another set of perpendicular lines on the graph paper.
- On a single piece of paper, have the word parallel written or typed in bold print. Hand out two Twizzlers and have the students place them on the 2 letter Ls in parallel. Explain that when the 2 Twizzler lines are next to each other without touching, they are parallel. On another piece of paper, have the word perpendicular written or typed in bold print. Hand out two pretzel sticks and have students create the capital L in perpendicular. Explain that when the 2 pretzels are touching, or crossing, they are perpendicular. Then the students can eat the snacks.
|
Suggested Supports and Scaffolds:
- Pieces of string
- Graph paper
- Crayons/markers
- Manipulative shapes
- Pretzels and Twizzlers
- Assistive Technology
- Interactive whiteboard
|
| CCSS: 4.G.A.2 Classify two-dimensional figures based on the presence or absence of parallel or perpendicular lines, or the presence or absence of angles of a specified size. Recognize right angles as a category, and identify right triangles.
|
| CCC:
|
4GM.1j4
|
Categorize angles as right, acute, or obtuse.
|
| Strand: Geometry
|
Family: Recognizing, Describing and Naming and Classifying
|
| Progress Indicator: E.GM.1j Recognizing and drawing points, lines, line segments, rays, angles, and perpendicular and parallel lines and identifying these in plane figures
|
| Essential Understandings
|
Concrete Understandings:
- Recognize that every corner/vertices of a 2-D figure has an angle.
- Recognize that angles can be acute, obtuse, or right based on their measure.
|
Representation:
- Given a picture of an angle (not in a shape) identify if the angle is acute, obtuse, or right.
- Know the following vocabulary: angle, right angle, obtuse angle, acute angle, degrees
|
Suggested Instructional Strategies:
- Students will review parallel lines and perpendicular lines using a prior strategy (make T with arms, hold arms straight above heads, etc.). Ask students what they notice when a partner makes a T with their arms, and they "trace" from the fingertip to a fingertip and down (they should notice that this makes a "corner"). Ask if they have seen this shape before, or can find it somewhere else in the classroom-paper edge, file cabinet edge, whiteboard edge, etc. All of these are angles, specifically right angles, made by perpendicular lines. Ask students what shape they can make in the corner of these right triangles (should be a square). Tell students that in a right angle, you can find a square in the corner. Have them find other right angles in the classroom by using a square from a manipulative pack to test out their ideas.
- Review right angles (angles you can make a square in the corner). Ask students to draw a right angle on graph paper. Have them close the angle by adding a line segment. Ask what shape they have made (a triangle). Explain that this triangle is a right triangle because it has a right angle as one of the 3 angles. Ask students to try to make another right triangle on their paper with sides of different lengths. Discuss what had to stay the same and what could change.
- Review right triangles (need a right angle). Have students draw a right triangle on the graph paper. Using a highlighter, have them cut the triangle in half, and color one half of the triangle. Is this still a right triangle? (No, not a right angle.) This is a smaller angle than the right triangle, so I think it is very cute. Angles that are smaller than right angles are called acute angles. Have the students cut the remaining angle in half again, and color. Is this angle acute? (Yes, it is still smaller than the right angle). Have the students make a guess with a partner as to how far they could go before the angle was not acute anymore. Show some of the attempts and talk about which ones are correct, which ones are incorrect. You can also simply do this on the overhead as a group (keep dividing and discussing).
- Review right triangles, right angles, acute triangles, acute angles. Have students draw another right triangle on graph paper. This time, have students ADD a line extending the triangle to widen it. Ask students if this is still a right triangle (no, it does not have a right angle anymore). Tell them that anytime an angle is MORE than 90 degrees, it is too large to be a right angle, and we call that obtuse. Continue to have them widen the triangle to see how far they think it can go before it is no longer considered obtuse. Also, ask them how SMALL they can make it before it will not be considered obtuse, and will be considered right or acute again.
- Use Time Delay to teach angles
|
Suggested Supports and Scaffolds:
- Manipulatives that include squares
- Graph paper
- Highlighters or crayons
- Wikistix
- Assistive Technology
- Interactive whiteboard
- Computer software
- Protractor
|
* Refer to Instructional Resource Guide for full descriptions and examples of systematic instructional strategies
Additional Resources
http://www.mathplayground.com/measuringangles.html
| CCSS: 4.G.A.3 Recognize a line of symmetry for a two-dimensional figure as a line across the figure such that the figure can be folded along the line into matching parts; identify line-symmetric figures and draw lines of symmetry.
|
| CCC:
|
4.GM.1k1
|
Recognize a line of symmetry in a figure.
|
| Strand: Geometry
|
Family: Transforming and Graphing
|
| Progress Indicator: E.GM.1k Recognizing and drawing lines of symmetry in a variety of figures
|
| Essential Understandings
|
Concrete Understandings:
- Distinguish 2-D figures from other figures.
- Fold paper so all the sides match up to test whether it has a line of symmetry.
|
Representation:
- Given a picture, select shapes that have a line of symmetry already drawn.
- Given a picture, select shapes that are symmetrical.
|
Suggested Instructional Strategies:
- Show students a picture of a happy face. Using paint or ink, mark one eye and half of the mouth, and then fold it length-wise in half. Ask the students if they think that the picture is the same on both sides of the fold. Unfold the picture and see what pattern the ink or paint made. Do the same thing, this time fold the picture width-wise. Ask the students again if they think that the picture is the same on both sides of the fold. Unfold the picture and see what pattern the ink or paint made. Tell students that when you can fold a picture and have both sides match up, that picture has symmetry, it matches. The line you can fold it on is called the line of symmetry. That line may NOT be in more than one place on a picture. Hand out or try the same thing with several pictures. See if students can find a line of symmetry or more than one line of symmetry in the pictures.
- Using wikistix, have students try to find lines of symmetry on different shapes. Once they place the wikistix, have them fold the shape along the wikistix and see if the shape is the same along the fold. If not, they must replace the wikistix in a different area and try again. If it works, they can draw the line with pen or pencil.
- Multiple exemplar training
|
Supports and Scaffolds:
- Picture of common symmetrical item (happy face, butterfly, button)
- Paint or ink
- Wikistix
|
* Refer to Instructional Resource Guide for full descriptions and examples of systematic instructional strategies.
| CCSS: 5.G.A.1 Use a pair of perpendicular number lines, called axes, to define a coordinate system, with the intersection of the lines (the origin) arranged to coincide with the – on each line and a given point in the plane located by using an ordered pair of numbers called its coordinates. Understand that the first number indicates how far to travel from the origin in the direction of one axis, and the second number indicates how far to travel in the direction of the second axis, with the convention that the names of the two axes and the coordinates correspond (e.g., x-axis and x-coordinate, y-axis and y-coordinate).
|
| CCC:
|
5.GM.1c3
|
Use order pairs to graph given points.
|
| Strand: Geometry
|
Family: Transforming and Graphing
|
| Progress Indicator: M.GM.1c Demonstrating the use of a coordinate system by locating/graphing a given point or polygon using ordered pairs
|
| Essential Understandings
|
Concrete Understandings:
- Identify the x- and y- axis.
- Identify the origin (i.e., point of intersection).
- Complete concrete graphing of points (e.g., put the straw up on 3 on the x-axis; put the next straw across on 2 on the y-axis. Put a chip there [for 3,2]).
- Identify that in an ordered pair, the first coordinate is the location on the x-axis and the second is the location on the y-axis.
|
Representation:
- Understand the following concepts and vocabulary: coordinates, ordered pair, origin, axis, grid, point.
|
Suggested Instructional Strategies:
- Task analysis: Identify number to be plotted on x-axis, plot, identify number to be plotted on the y-axis, plot.
- Use games such as "Battleship" to practice graphing.
- Use a grid on the floor and have students move to coordinates.
- Make a treasure hunt with ordered pairs.
- Use ordered pairs that create a picture when graphed.
|
Suggested Supports and Scaffolds:
- Grid paper
- Models
- Graphic organizer
- Computer websites
- Raised graph paper
- Raised coordinate plane with raised x- and y-axis and raised horizontal and vertical lines
- Visual representation of task analysis
- Maps of local and/or well-known cities
- Maps of school or classroom
|
| CCSS: 6.G.A.3 Draw polygons in the coordinate plane given coordinates for the vertices; use coordinates to find the length of a side joining points with the same first coordinate or the same second coordinate. Apply these techniques in the context of solving real-world and mathematical problems.
|
| CCC:
|
6.GM.1c7
|
Use coordinate points to draw polygons.
|
| Strand: Geometry
|
Family: Transforming and Graphing
|
| Progress Indicator: M.GM.1c Demonstrating the use of a coordinate system by locating/graphing a given point or polygon using ordered pairs
|
| Essential Understandings
|
Concrete Understandings:
- Identify the x- and y- axis.
- Identify the origin (i.e., point of intersection).
- Complete concrete graphing of points (e.g., put the straw up on 3 on the x-axis; put the next straw across on 2 on the y-axis. Put a chip there [for 3,2]).
- Identify that in an ordered pair, the first coordinate is the location on the x-axis and the second is the location on the y-axis.
- Recognize that polygons can be formed by connected, selected points in a coordinate plane.
- Decontextualize situation to identify coordinate points.
|
Representation:
- Understand the following concepts and vocabulary: coordinates, ordered pair, origin, axis, grid, point.
|
Suggested Instructional Strategies:
- Model-Lead-Test determining if number is x or y for coordinate points
- Task analysis for finding coordinate points on graph:
- Determine if each point is x,y.
- Determine quadrant to start points.
- Locate each coordinate point.
- Mark each point.
- Connect points.
- Explicitly teach how to plot point on a graph.
|
Suggested Supports and Scaffolds:
- Graph with labels for x and y as well as +/- in each corresponding quadrant
- Raised line graph
- Large graph for students eye gaze to identify x, y coordinate points
- Adapted ruler
- Interactive technology
- AAC device
- Graph with less lines than typical graph paper
|
* Refer to Instructional Resource Guide for full descriptions and examples of systematic instructional strategies
| CCSS: 6.G.A.1 Find the area of right triangles, other triangles, special quadrilaterals, and polygons by composing into rectangles or decomposing into triangles and other shapes; apply these techniques in the context of solving real-world and mathematical problems.
|
| CCC:
|
6.GM.1d1
|
Find area of quadrilaterals.
|
| Strand: Geometry
|
Family: Geometric Problems
|
| Progress Indicator: M.GM.1d Solving area, surface area, and volume problems by composing and decomposing figures
|
| Essential Understandings
|
Concrete Understandings:
- Use square tiles to cover a rectangle.
- Count the number of tiles to determine the area.
|
Representation:
- Use formula to find area.
- Understand the following concepts and vocabulary: base, height, area, quadrilateral.
|
Suggested Instructional Strategies:
- Explicit instruction on using formula to find area
- Task analysis: Measure the length, put number in formula, measure height, put number in formula, use calculator to compute area
|
* Calculator
- Template with formula
- Ruler
- Labeled figure (with numbers)
- Grid or dot paper
- iPad/iTouch Geo Board apps
- 1x1 squares
- Tiling with unit squares of the appropriate unit fraction side lengths:
|
| CCSS: 6.G.A.4 Represent three-dimensional figures using nets made up of rectangles and triangles, and use the nets to find the surface area of these figures. Apply these techniques in the context of solving real-world mathematical problems.
|
| CCC:
|
7.GM.1h2
|
Find the surface area of three-dimensional figures using nets of rectangles or triangles.
|
| Strand: Geometry
|
Family: Geometric Problems
|
| Progress Indicator: M.GM.1h Solving real-world area, surface area, and volume problems using different strategies (formulas and decomposing figures)
|
| Essential Understandings
|
Concrete Understandings:
- Demonstrate an understanding of the concept of the surface area of a rectangular prism.
- Unfold three-dimensional objects into nets.
|
Representation:
- Use formulas for surface area.
- Understand symbols from formula.
- Understand 2- and 3-D dimensionality (2-D is space covered, 3-D is the space within).
- Understand the following concepts and vocabulary: base, height, slant, surface area, prism, net, face.
|
Suggested Instructional Strategies:
- Task analysis
- Identify a face in the figure.
- Find the area of each face in the figure
- measure the length
- put number in formula
- measure height
- put number in formula
- use calculator to compute area
- Add area of all faces together to find the surface area
- Explicit use of the formulas
|
Suggested Supports and Scaffolds:
- Template with formula
- Calculator
- Computer software
- Interactive whiteboard
- Numbered cubes
- Grid or dot paper
- Tiling with unit squares of the appropriate unit fraction side lengths
- Squares that can be joined together to develop nets for a cube
|
| CCSS: 7.G.B.6 Solve real-world and mathematical problems involving area, volume, and surface area of two- and three-dimensional objects composed of triangles, quadrilaterals, polygons, cubes, and right prisms.
|
| CCC:
|
7.GM.1h3
|
Find area of plane figures and surface area of solid figures (quadrilaterals).
|
| Strand: Geometry
|
Family: Geometric Problems
|
| Progress Indicator: M.GM.1h Solving real-world area, surface area, and volume problems using different strategies (formulas and decomposing figures)
|
| Essential Understandings
|
Concrete Understandings:
- Demonstrate an understanding of the concept of the surface area of a rectangular prism.
- Unfold three-dimensional objects into flat nets where all faces are visible.
- Recognize that surface area is found by adding up the individual areas of each face.
|
Representation:
- Use formulas for surface area.
- Understand symbols from formula.
- Understand 2- and 3-D dimensionality (2-D is space covered, 3-D is the space within).
- Understand the following concepts and vocabulary: base, height, slant, surface area, prism, net, face.
|
Suggested Instructional Strategies:
- Task analysis: Identify a face in the figure, find the area of each face in the figure, add all faces together to find the surface area
- Explicit use of the formulas
- Model-Lead-Test: Locate plane figures in environment such as desk, wall, door, piece of paper then measure and find area
|
Suggested Supports and Scaffolds:
- Interactive whiteboard
- Visual task analysis for finding area
- Post-its to measure area of large quadrilaterals
- Template with formula
- Calculator
- Computer software
- Grid or dot paper
- Tiling with unit squares of the appropriate unit fraction side lengths
- Squares that can be joined together to develop nets for a cube
|
*Refer to Instructional Resource Guide for full descriptions and examples of systematic instructional strategies
| CCSS: 7.G.B.6 Solve real-world and mathematical problems involving area, volume, and surface area of two- and three-dimensional objects composed of triangles, quadrilaterals, polygons, cubes, and right prisms.
|
| CCC:
|
7.GM.1h4
|
Find area of an equilateral, isosceles, and scalene triangles.
|
| Strand: Geometry
|
Family: Geometric Problems
|
| Progress Indicator: M.GM.1h Solving real-world area, surface area, and volume problems using different strategies (formulas and decomposing figures)
|
| Essential Understandings
|
Concrete Understandings:
- Identify base and height.
|
Representation:
- Multiply whole numbers, decimals, and fractions.
|
Suggested Instructional Strategies:
- Model-Lead-Test various examples of how to find area
- Task analysis of finding area of shapes
- Base x height
- Base x height then divide in half
|
Suggested Supports and Scaffolds:
- Tiles on floor to map out shapes
- Manipulative blocks (textured if possible) to place inside of shapes to find area
- Assistive Technology
- Calculator
- Interactive whiteboard
|
* Refer to Instructional Resource Guide for full descriptions and examples of systematic instructional strategies
Additional Resource
http://www.mathplayground.com/howto_area_triangle.html
| CCSS: 8.G.A.4 Understand that a two-dimensional figure is similar to another if the second can be obtained from the first by a sequence of rotations, reflections, translations, and dilations; given two similar two-dimensional figures, describe a sequence that exhibits the similarity between them.
|
| CCC:
|
8.GM.1g1
|
Recognize congruent and similar figures.
|
| Strand: Geometry
|
Family: Recognizing, Describing and Naming and Classifying
|
| Progress Indicator: M.GM.1g Demonstrating congruence and similarity using a variety of two-dimensional figures
|
| Essential Understandings
|
Concrete Understandings:
- Recognize corresponding points and sides in figures (e.g., match concrete examples of congruent shapes, match concrete examples of similar shapes).
|
Representation:
- Understand the following concepts and vocabulary: figures, congruent, similar
- Describe circles, squares, rectangles, and triangles, by telling about their shape, sides, lines, and angles.
|
Suggested Instructional Strategies:
- Teach using multiple exemplars using objects first then 2-dimensional figures (congruent, similar).
- Match to same
- Explain that similarities between objects can include shapes, lines, and angles.
|
Suggested Supports and Scaffolds:
- Graphic organizer
- Transparent figures
- Interactive whiteboard or other technology
- Create a book or handout showing vocabulary and examples
- Tracing paper
- Grid or dot paper
- Manipulatives (e.g., 3-D shapes)
- Attribute tiles
|
| CCSS: 8.G.B.7 Apply the Pythagorean Theorem to determine unknown side lengths in right triangles in real-world and mathematical problems in two and three dimensions.
|
| CCC:
|
H.GM.1a2
|
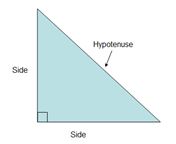
Find the missing side lengths of a two-dimensional right triangle (Pythagorean Theorem).
|
| Strand: Geometry
|
Family: Constructing – Establishing a Figure
|
| Progress Indicator: H.GM.1a Applying the Pythagorean Theorem
|
| Essential Understandings
|
Concrete Understandings:
- Identify a right angle triangle.
- Identify sides and/or hypotenuse of a right triangle.
- Multiply a number by itself.
|
Representation:
- Use formula to find missing side of a triangle.
- Represent/draw right triangles from given measures.
- Recognize meaning of exponents.
- Solve for square root.
- Understand the following concepts and vocabulary: hypotenuse, Identify symbol for exponent.
|
Suggested Instructional Strategies:
- Explicit instruction on the formula: Does this triangle have a right angle? Identify the right angle. Use sides of right angle to find length. Enter answer.
- Discuss application in real-world situations.
|
Suggested Supports and Scaffolds:
- Calculator
- Illustrations
- Template for equation
- Interactive whiteboard
|
| CCSS: HSG-CO.A.5 Given a geometric figure and a rotation, reflection, or translation, draw the transformed figure. Specify a sequence of transformation that will carry a given figure onto another.
G.CO.3 Given a rectangle, parallelogram, trapezoid, or regular polygon, describe the rotations and reflections that carry onto itself.
|
| CCC:
|
H.GM.1c1
|
Construct, draw, or recognize a figure after its rotation, reflection, or translation.
|
| Strand: Geometry
|
Family: Transforming and Graphing
|
| Progress Indicator: H.GM.1c Applying understanding of rotations, reflections, and translations to construct figures (e.g., using coordinates, models, drawings, transparencies, dynamic geometry software)'
|
| Essential Understandings
|
Concrete Understandings:
- Use coordinates to draw plane figures in a coordinate plane.
|
Representation:
- Distinguish between orientations of plane figures.
- Distinguish between translations, rotations, and reflections.
|
Suggested Instructional Strategies:
- Model-Lead-Test: Use math tools (e.g., tangrams, Legos, stickers) to demonstrate the transformation of the shape. Demonstrate one transformation at a time.
- Use most-to-least prompting to teach students to demonstrate transformations
- Given a picture or drawing of a shape, students use whatever tool is appropriate to transform the shape.
- Label the sides of a cube (dice) with letters or stickers (whichever is more recognizable to the student), rotate the cube and note the change.
|
Suggested Supports and Scaffolds:
- Manipulatives such as Geoboards, tangram shapes, pattern blocks, magnetic pattern blocks
- Legos to construct then manipulate the object
- Graphic Organizer
- Provide an arrow to show the direction of the movement of the object to create a flip, a turn, or a slide (transformation).
- Assistive Technology
- Virtual manipulatives
|
* Refer to Instructional Resource Guide for full descriptions and examples of systematic instructional strategies
Additional Resources
www.mathisfun.com/geometry – Point & click to transform the shape
www.eduplace.com/kids/mw/swfs/robopacker_grade4.html – Transform shapes to create a robot


